Wednesday, January 17, 2018

Willows 2017 Christmas Creation


Christmas Tree 2017


I changed up my tree this year! All traditional Christmas 🎄 colors! Actually it’s even a new tree we purchased at the end of 2016 (at a very small price I might add). It’s  9’ feet tall! It truly looks like a real tree. I purchased a new topper last year too, the Santa Hat.

18th Birthday Cake

 It was my granddaughters 18th birthday and she wanted me to make her a cake. So this is it!  I cut the topper myself with my Cricut Air.. and Glitter paper. Hope you like 🎂

Friday, September 9, 2016


I created this while staying at our cabin in Tennessee. I did this art piece using acrylic paints for my background and the white swirls! I created the butterflies with pages from an old phone book! Lol Hey it works, you know how we say use what you got, well that's exactly what I did! I splattered them with paint colors that were in the phrasing piece. This beautiful piece with the wording came from the card my son and daughter in law gave me for Mothers Day! When I first read it and set my eyes on it, I knew I had to do something special with it! No way was I going to put that away in a drawer! I just had to share it with others too!

Sunday, June 7, 2015

Vintage Shabby Monochromatic Home Deco Piece


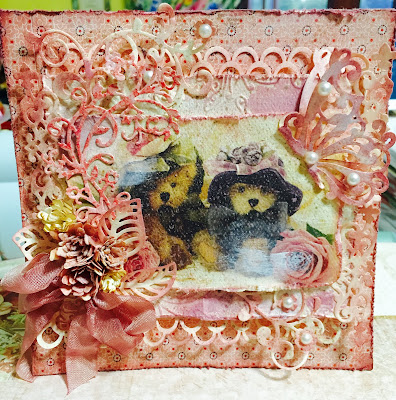
hello friends, hope you're having a great day! Today I have a little home deco piece to share with you!  I really had fun making it! Anytime I get to play with paper and ink I'm in my happy place. Love these shades of pink! If you knew what a teddy bear nut I am, you would say that I need help! My focal image of the teddies came from a sweet little note card I found stashed away.


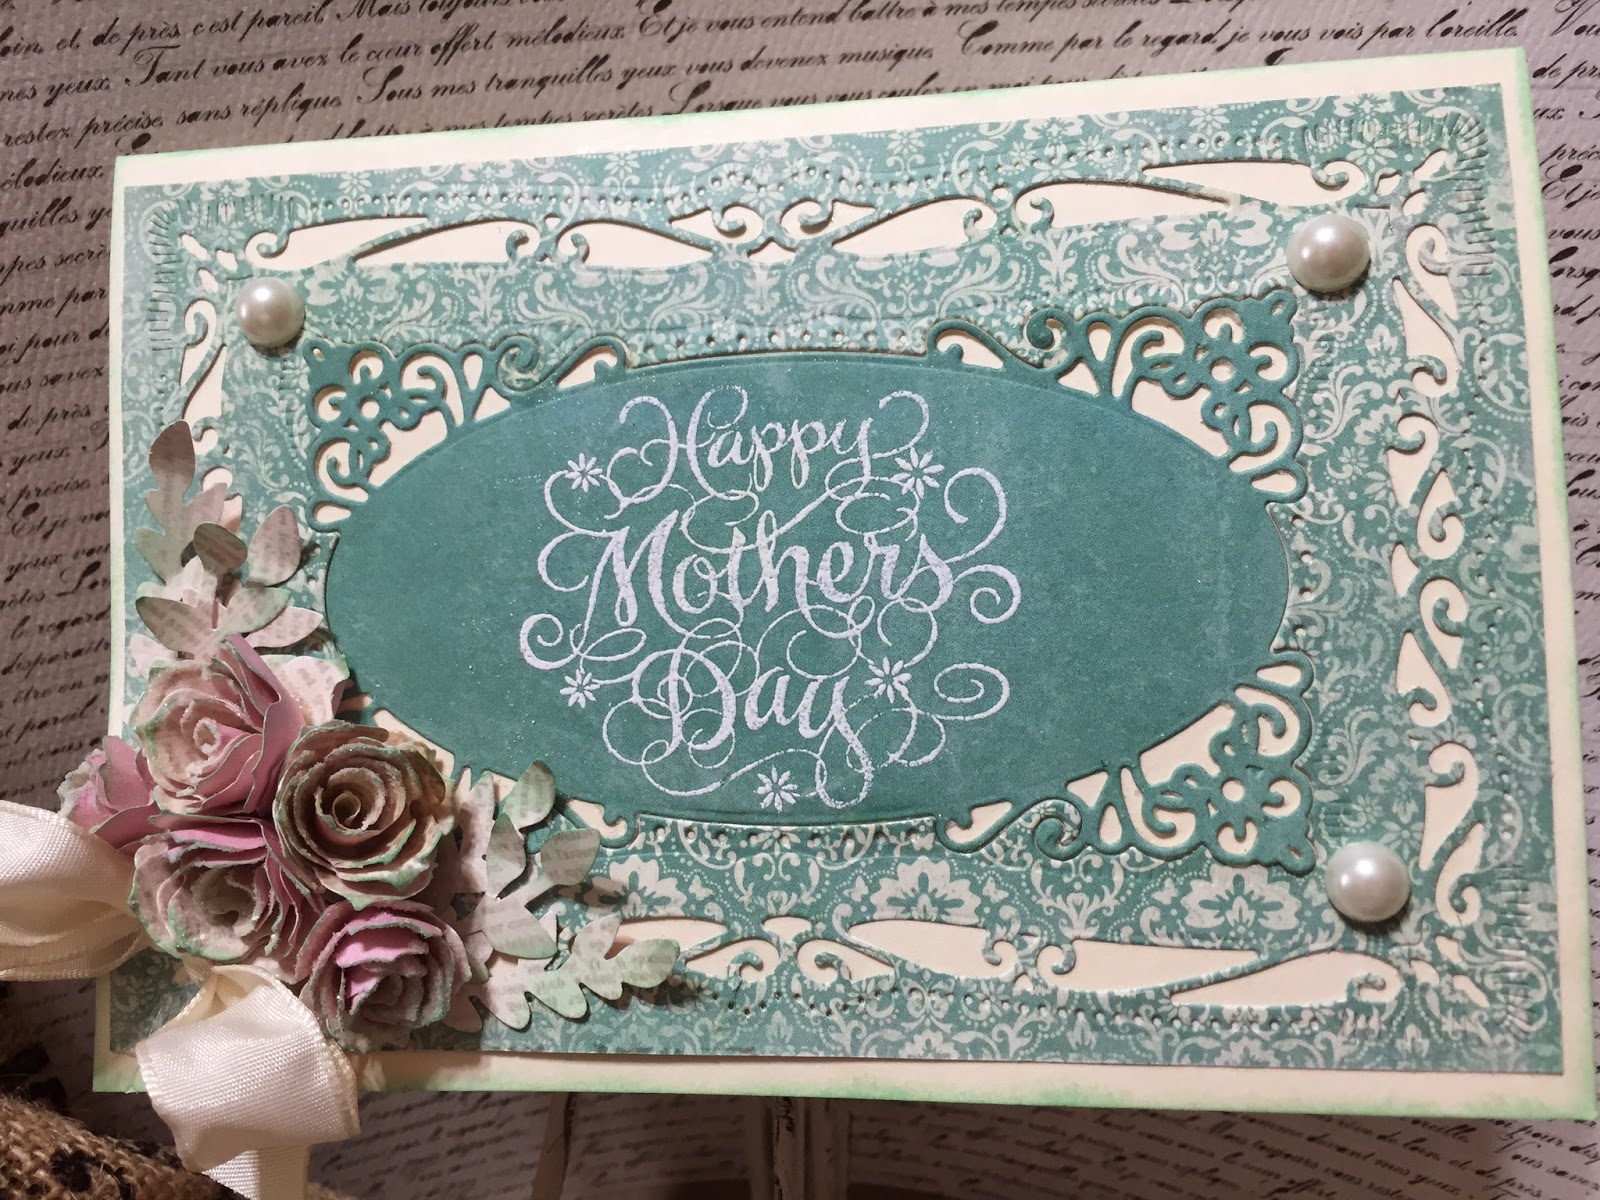
First, I attached my backgound paper to medium weight chipboard, then used my Tim Holtz distress tool to all the edges and then applied distress ink to them. Borders were punched with a Martha Stewart punch to layer around the piece. On top of the border embellishments, I layered vanilla cardstock that was embossed with a folder from Embossilicous first. However, you have to look really close to see it!  Victorian Velvet distress ink was used to highlight the embossed butterflies and was splattered in various areas over the paper. Several different styles of flourishes and elements were cut and placed on top of that layer. They were distressed with the same color ink. Flatback pearls were applied to a few of the flourishes and the butterfly. I love those pretty lil things, nothing more feminine! Well, maybe diamonds! LOL 

Left side close-up

The cute little flowers were made with the new Tim Holtz mini tattered flower die set and colored some of them with V V distress ink and distress the others with vintage photo. Rock candy glitter was used on the pink flowers but it's difficult to see it in the pictures! A die from Cottage Cutz called Garden Flourish was used on the top layer. The leaves were made with a little die from La La Land Crafts. The seam binding ribbon bow was colored with V V distress ink. 
Right side close-up
The butterfly was distressed with V V ink, then folded in half. The die used was from spellbinders called Outrageous Butterfly. It makes a gorgeous butterfly! A little gesso was splattered here and there for highlights. The small easel from Tim Holtz was used to display my project. I truly hope you like my creation and get a little inspiration from it!


I've entered this project in the challenges below;


Monday, June 1, 2015

Baby Boy Blue Vintage Card! Graphic 45

Wow, that was a mouth full! Anyway thought I would share this little card that I made with Graphic 45's Precious Memories collection. I just love this collection so much, it's so sweet, for a boy or a girl. The vintage baby and Momma pictures are awesome to use in cards, scrapbooking or even a home deco project.

Here is the front view of the card.
I fussy cut the baby clothes, aren't they adorable?


A couple close- up views
I handmade the bow with cream silk wired ribbon, 
then placed tiny blue flowers around the center.
There are a lot of layers going on. I distressed all the edges.


I'm entering this card in the challenge below;
Nothing makes me happier then babies! I was a labor/nursery nurse for many years!

Friday, May 29, 2015

2015 Mothers Day Cards

I made cards for the Moms I have in my life! Thought I'd share them with you, even though I don't have step by step instructions. They are pretty basic cards anyway. Hopefully, you may get a little  inspiration from them.

1st card
The above card was made for my lovely Mom. I used spellbinders rectangle dies and a die from My Creative for the flowers. The foliage was made with a punch from Fiskars. The stamp is a old favorite of mine, it's a single wood block stamp. I just love the fourishy font!


2nd card
This card was made for my wonderful Mom in Law. I used a beautiful wood stamp with a humming bird and flowers from INKADINKADO. I stamped it with a very light gray stamp pad, so the lines would be very faint. I  then watercolored it with my Tim Holtz distress markers. I cut and layered it with Spellbinders Labels Ten dies. it's difficult to see but I used a glitter cardstock for the bottom layer. I used glossy accents to make little water droplets on the flowers. The foliage on the card was the same punch from Fiskars. The stamped greeting and tag is from My Creative Time. 


3rd card


This card was for my sweet daughter. I seldom use this color combination but I really liked it once I got everything put together! All the dies and stamps I used were from My Creative Time. I first embossed the ovals with a 6X6 butterfly folder. Then the heads of the flowers were watercolored with abandoned coral ink and the leaves with mowed lawn ink. The center of the flowers were colored with gathered twigs ink, then I applied Glossy Accents over it. 

I'm entering my 1st card into the challenge below;
Fashionable Stamping - Challenge #98 - Old Favourites/ For my 1st card

Im entering my 1st card into the challenge below;
Beyond Grey Challenges#68 May - Make Your Own Embellishments

I'm entering my 2nd card into the challenge below;
Fantasy Stampers - Challenge #37 - Wings and Things/ For my 2nd card


I'm entering my 3rd card into the challenge below;
A Gem of A Challenge #145 - Flowers

I'm entering my 3rd card into the challenge below;
 Come and Get It Challenges - Tic Tac Toe/ For my 3rd card-1. die cut 2.sentiment 3. flowers